Preparing art for full-color printing is now easier than ever. But there are some useful steps you’ll need to take to avoid speed bumps later.
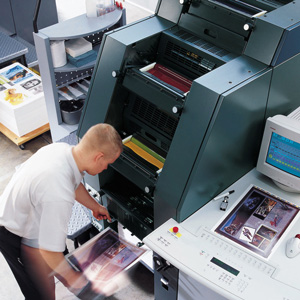
 What is prepress? It’s the process of converting a layout or design into a format that is ready for a printing press.
Before Adobe’s Photoshop came along, prepress work took a team of specialists, a full day of effort, lots of film, tricky color separations and a hefty budget. Now it takes a few minutes with a digital file.
So we’ve made a list for the more daring of you who are interested in creating a press-ready art file yourself, rather than having someone else (like us) do it. Now, these steps work for us and our postcard magnet mailers; but if you use another printer, you should check with them first. Also, this guide is for those already familiar with professional grade programs like Photoshop and Adobe Illustrator.
Just know that if all this is more than you can do, or want to do, that’s fine. Just tell us what you have, and what you’d like. We’ll help make it happen.
For the adventurous, here are your 10 steps:
1. Start with great art. Check out our post about Good Photography.
2. Use professional grade programs like Photoshop (for images) and Illustrator (for type, designs and layout). Stay clear of home publishing software like Publisher or Word.
3. Save a new copy of your working file as you proceed through each of the following steps, so you can return to a step if something goes wrong later. Save the Photoshop (image) files as TIFF or PSD format. Save the Illustrator (layout) files as EPS or PDF.
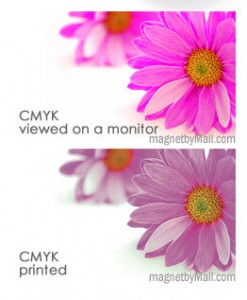
 4. Set up the color mode for your image and layout files as CMYK (rather than RGB). Our printing press is a CMYK press; it uses four inks: Cyan blue, Magenta red, Yellow and blacK to achieve the effect of full-spectrum color. If you send art files that are set up as RGB, you might be surprised by the results.
5. Set your image size. In Photoshop: 1) be sure you’re working with image resolution that is 350 dots per inch (DPI) (or at least a minimum 300 DPI) and 2) size the image to be exactly what you’d like on the printed piece. Be sure to allow some extra image area if you’d like the image to print (‘bleed’) off the edge of the card — we’ll print on bigger paper and trim the page to the correct size.
6. Prepare a layout for your postcard and magnet, made to the exact size of the final item. This is best done in a layout program like Illustrator (set to CMYK). You can set your type and position any designs exactly where you’d like them. Colors can be chosen from the CMYK color palette. Keep in mind that colors on your screen usually become deeper (darker) when they print as ink on paper. When colors are printed, and then laminated, they appear deeper still. Avoid small, light text on dark backgrounds, since the text could fill in.
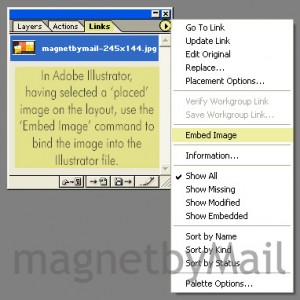
 7. You can position your Photoshop images on your Illustrator layout. But to really attach the Photoshop image to the Illustrator file you’ll need to 1) use the Place command (File -> Place) when you first collect the Photoshop image for Illustrator and 2) then, with the image on the layout, and selected, use the Embed command (from the Links menu, select ‘Embed Image’). Otherwise, the image file will not be a part of the Illustrator file and you’ll need to send us the image file separately.
8. For black graphics and text, you can set the CMYK value to 70%-70%-20%-100%. This will result in a look that is richer than simple black ink.
9. In Illustrator, convert any typesetting in your layout to vector outlines.
10. If you want us to print right to the edge of the card, provide us with graphics that are 1/4″ wider so we can print (with a bleed) and trim.
There is a lot here, and even an experienced designer can run into a snag. So don’t hesitate to contact us if you have questions or need help creating your files.
The end result — seeing your magnet mailer at work, making the phone ring — makes it all worth it.
Always here to help you make a great postcard magnet campaign:
magnetbyMail.com